


No products in the cart.
Return To Shop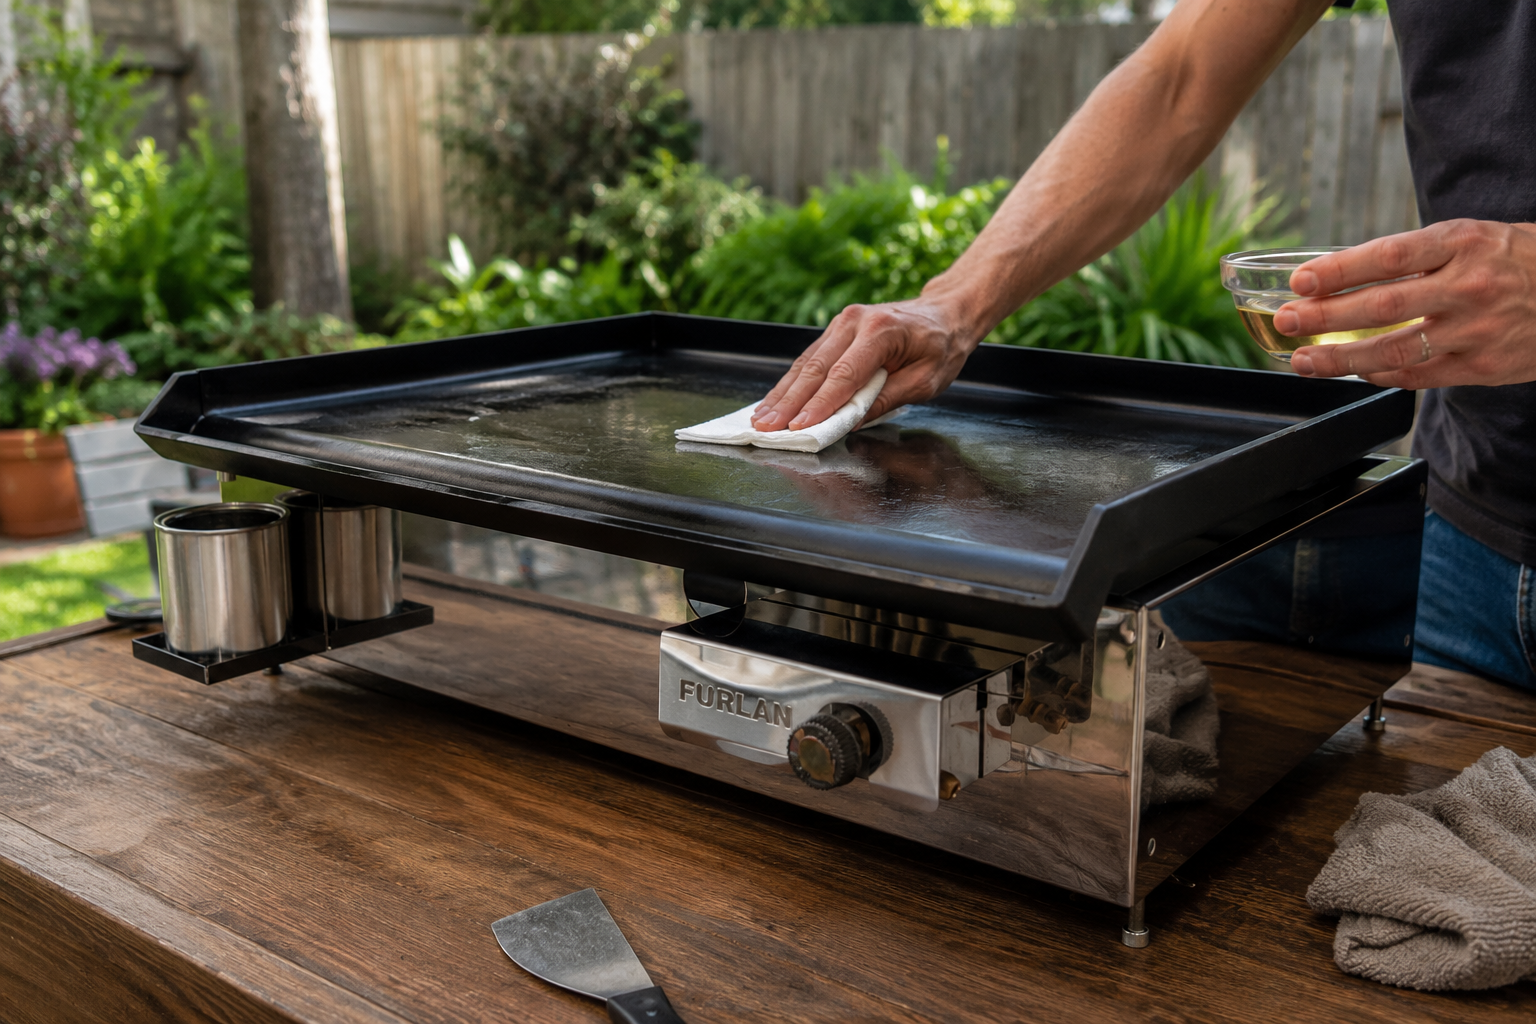
How to Clean a Steel Grill Plate After Cooking
Cleaning your grill plate properly after every use is what keeps it performing well cook after cook — and it’s simpler than most people expect. The process itself only takes a few minutes, but there’s one step people skip more often than any other, and it’s the one that matters most for how the plate performs next time: oiling it before you put it away.
Here’s the full process, done right.
Clean While the Plate Is Still Warm
The biggest mistake in cleaning a grill plate is waiting until it’s completely cold. Residue, grease, and small bits of food scrape off far more easily while the plate still has some warmth in it. Once it cools all the way down, everything hardens and sticks to the surface, turning a thirty-second scrape into a much longer scrub.
As soon as you’re done cooking, turn off the burners and let the plate cool from “too hot to touch” down to warm — a couple of minutes is usually enough.
Step 1: Scrape Off Loose Debris
Use a flat metal scraper or a wide spatula to push loose food residue and larger bits of grease toward the edge of the plate, or toward a drainage channel or grease tray if your grill has one. This step alone removes most of what’s sitting on the surface, without any need for water or cleaning products yet.
Work in one direction rather than scrubbing back and forth, and avoid sharp or serrated tools that can scratch the steel.
Step 2: Wipe Down the Surface
Once loose debris is cleared, wipe the plate with a damp cloth or paper towel. For anything a dry scrape didn’t lift, a small amount of hot water on the cloth usually does the job. If you’re dealing with something more stubborn, a soft sponge with a little mild dish soap works — just make sure the plate is rinsed and wiped dry afterward so no soap residue is left behind for next time.
Avoid steel wool or heavy-duty scouring pads as a routine tool. Used often, they create fine scratches that build up over time and actually make the surface more prone to sticking in the long run, not less.
Step 3: Check and Empty the Grease Tray
While the plate itself is the main focus, don’t forget the grease tray or drainage channel underneath. A full or clogged tray affects how well grease drains during your next cook, and left too long, built-up grease can also become a fire risk. Empty and wipe it out as part of your regular cleaning routine, not just when it’s overflowing.
Step 4: Dry the Plate Completely
Before moving to the final step, make sure the plate is fully dry. Any leftover moisture sitting on stainless steel is exactly what leads to dullness or light surface rust over time, especially if the grill is stored outdoors. A clean, dry cloth or a few minutes of open air is usually all it takes.
Step 5: Oil the Plate Before You Put It Away
This is the step that gets skipped most often — and it’s the one that matters most for how your grill performs next time you use it.
Once the plate is clean and completely dry, wipe a very thin, even layer of oil across the entire surface using a paper towel or cloth. A high-smoke-point oil like canola, sunflower, or grapeseed works well and doesn’t need to be reheated or “burned in” at this stage — you’re not cooking, just coating.
Why this step matters so much:
- It protects against rust and dullness. Bare stainless steel exposed to air and moisture — especially outdoors, and especially through humid or rainy stretches — can develop light rust spots or a dull, rough finish over time. A thin oil layer creates a barrier against that moisture.
- It preserves the plate’s natural non-stick quality. A grill plate builds up a light seasoning over repeated use, similar to cast iron. Oiling after every clean protects that seasoning instead of letting it wear away and start from zero each time.
- It saves you work later. A plate that’s oiled before storage starts your next cook from a better position — cleaner, smoother, and less prone to sticking from the very first use.
Skipping this step doesn’t cause a problem immediately. It’s the kind of thing that shows up weeks or months later, as a plate that’s duller, rougher, and more prone to sticking than it used to be — often without the owner realising why.
A Simple Routine to Stick To
- Let the plate cool to warm, not cold.
- Scrape off loose debris.
- Wipe down with a damp cloth (soap only if needed, then rinse and dry).
- Empty the grease tray.
- Dry the plate completely.
- Wipe on a thin layer of oil before closing the lid or covering the grill.
Five minutes of cleaning, with that last step included, is the difference between a grill plate that performs the same way after a hundred uses and one that slowly gets harder to cook on. Make oiling the very last thing you do, every time, and the rest of your maintenance stays easy.

About author

Add comment